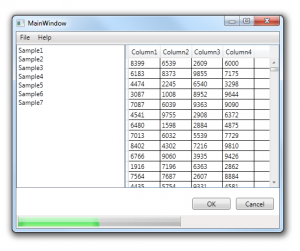
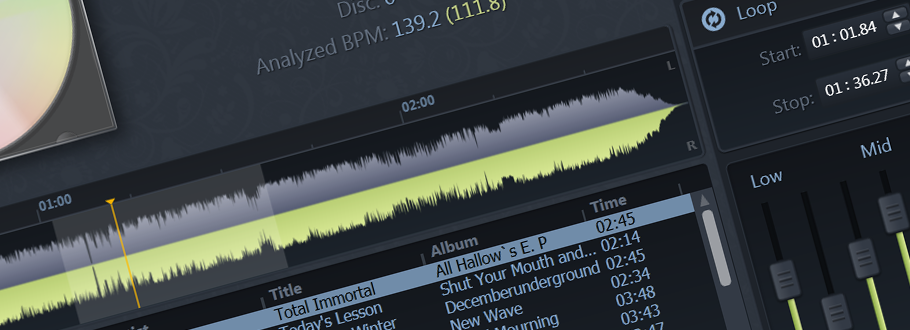
A few years back, we were demonstrating a WinForms application we’d just spent a few years developing to the Vice President of the R&D department. Things were starting to come together and look really nice. Many tough battles were fought to develop custom real-time controls and get everything laid out properly. Months, to years, of effort went into choosing colors and gradients that were easy on the eyes. Hell, we’d even gone out of our way to get in decent support for higher, non-default DPI settings. All-in-all, we were pretty proud of the UX for this application. So, the VP was sitting there, toying around with the application. Then he maximizes the window. The application does exactly what it is supposed to. It fills up all 26 inches of his fancy high-resolution monitor. Everything is docked properly, so the main datagrid on the form expands both vertically and horizontally. The Ribbon Bar at the top of the application keeps its height and the navigation pane on the side keeps its width. Everything seems to be going well.
Luckily, our VP wasn’t the only person in the world to have this request. Microsoft noted this issue and seems to have built WPF around this very problem. However, it intrigues me that more people have not seemed to clue in on this new way of scaling their application’s Window. I’ve seen it out there, but only in about of a quarter of the WPF applications I’ve tried. I think either people aren’t aware of this new method or don’t know of a nice, robust way to implement it so that simply resizing the Window causes your UI elements to scale-up.
Implementing Scaling
At the heart of this scaling solution, there are two concepts at work. First, there is a LayoutTransform that will be applied at very root-most content element of your Window. Secondly, there will be some resize-detection logic in the Window to determine what sort of scaling needs to happen.
1 2 3 4 5 6 7 8 9 10 11 12 13 14 15 16 17 18 19 | <Window x:Class="WpfApplication1.MainWindow" xmlns="http://schemas.microsoft.com/winfx/2006/xaml/presentation" xmlns:x="http://schemas.microsoft.com/winfx/2006/xaml" Title="MainWindow" Name="myMainWindow" Width="500" Height="400" MinWidth="250" MinHeight="200"> <Grid Name="MainGrid" SizeChanged="MainGrid_SizeChanged"> <Grid.LayoutTransform> <ScaleTransform x:Name="ApplicationScaleTransform" CenterX="0" CenterY="0" ScaleX="{Binding ElementName=myMainWindow, Path=ScaleValue}" ScaleY="{Binding ElementName=myMainWindow, Path=ScaleValue}" /> </Grid.LayoutTransform> <!-- Window Content Here --> </Grid> |
Now, in the code-behind, we’ll be creating a ScaleValue dependency property for the ScaleTransform to bind to. This ScaleValue is set whenever the size of the Window changes. The value is calculated based on the current width or height divided by the designed-for width or height. We take the lower of those two values and make that our scaling mechanism. This makes the zoom effect similar to what you’re used to seeing when you use a Viewbox when the StretchDirection is “Both” and the Stretch style is “Fill.”
1 2 3 4 5 6 7 8 9 10 11 12 13 14 15 16 17 18 19 20 21 22 23 24 25 26 27 28 29 30 31 32 33 34 35 36 37 38 39 40 41 42 43 44 45 46 47 48 49 50 51 52 53 54 55 56 57 58 59 60 61 62 63 64 65 66 | public partial class MainWindow : Window { #region ScaleValue Depdency Property public static readonly DependencyProperty ScaleValueProperty = DependencyProperty.Register("ScaleValue", typeof(double), typeof(MainWindow), new UIPropertyMetadata(1.0, new PropertyChangedCallback(OnScaleValueChanged), new CoerceValueCallback(OnCoerceScaleValue))); private static object OnCoerceScaleValue(DependencyObject o, object value) { MainWindow mainWindow = o as MainWindow; if (mainWindow != null) return mainWindow.OnCoerceScaleValue((double)value); else return value; } private static void OnScaleValueChanged(DependencyObject o, DependencyPropertyChangedEventArgs e) { MainWindow mainWindow = o as MainWindow; if (mainWindow != null) mainWindow.OnScaleValueChanged((double)e.OldValue, (double)e.NewValue); } protected virtual double OnCoerceScaleValue(double value) { if (double.IsNaN(value)) return 1.0d; value = Math.Max(0.1, value); return value; } protected virtual void OnScaleValueChanged(double oldValue, double newValue) { } public double ScaleValue { get { return (double)GetValue(ScaleValueProperty); } set { SetValue(ScaleValueProperty, value); } } #endregion private void MainGrid_SizeChanged(object sender, EventArgs e) { CalculateScale(); } private void CalculateScale() { double yScale = ActualHeight / 400.0d; double xScale = ActualWidth / 500.0d; double value = Math.Min(xScale, yScale); ScaleValue = (double)OnCoerceScaleValue(MainGrid, value); } public MainWindow() { InitializeComponent(); } } |
That’s all there is to it! Beyond increasing the size of your Window, it works surprisingly well when decreasing the window size too, down to a certain level anyway. I find this solution to be robust enough to handle most cases my application, but be sure to read over the next section to understand some caveats.
Caveats
ScaleTransform can cause problems if any of your UI elements are rendered using pixel-based rendering techniques. What happens? Well, when you scale, the bitmap buffers of the controls start to stretch and appear blurry. Luckily, in my experience, very few third party components that were designed for WPF do this kind of pixel-based rendering. Kudos to the majority of WPF control developers for doing things the recommended way. In your own controls, there are a few key areas you need to be aware of where this can be problematic:
- Controls that use the new CacheMode property.
- Controls that use DrawingVisuals, RenderTargetBitmap or WriteableBitmap, and DrawingContext to draw.
- Use of WinForms components in your WPF application.
Dealing With The Caveats
CacheMode: To deal with CacheMode when scaling, you can try using the RenderAtScale property. I do this semi-automatically on my custom controls by including a mechanism to automatically detect what ScaleTransform has been applied to the control. Then, I make the RenderAtScale property the same. I include a “UseAutoScaling” property to allow the control’s user to decide whether or not they want to have this behavior happen in their Application.
1 2 3 4 5 6 7 8 9 10 11 12 13 14 15 16 17 18 19 20 21 22 23 24 25 26 27 28 29 30 31 32 33 34 35 36 37 38 39 40 41 42 43 44 45 46 47 48 49 50 51 52 53 | protected override void OnRenderSizeChanged(SizeChangedInfo sizeInfo) { base.OnRenderSizeChanged(sizeInfo); UpdateCacheScaling(); } private void UpdateCacheScaling() { if (myCanvas == null) return; BitmapCache cache = (BitmapCache)myCanvas.CacheMode; if (UseAutoScaling) { double totalTransformScale = GetTotalTransformScale(); if (cache.RenderAtScale != totalTransformScale) cache.RenderAtScale = totalTransformScale; } else { cache.RenderAtScale = 1.0d; } } private double GetTotalTransformScale() { double totalTransform = 1.0d; DependencyObject currentVisualTreeElement = this; do { Visual visual = currentVisualTreeElement as Visual; if (visual != null) { Transform transform = VisualTreeHelper.GetTransform(visual); // This condition is a way of determining if it // was a uniform scale transform. Is there some better way? if ((transform != null) && (transform.Value.M12 == 0) && (transform.Value.M21 == 0) && (transform.Value.OffsetX == 0) && (transform.Value.OffsetY == 0) && (transform.Value.M11 == transform.Value.M22)) { totalTransform *= transform.Value.M11; } } currentVisualTreeElement = VisualTreeHelper.GetParent(currentVisualTreeElement); } while (currentVisualTreeElement != null); return totalTransform; } |
RenderTargetBitmap or WriteableBitmap: I have found no great solution for this. If the control is being drawn using these techniques, the only option is to alter the code such that it renders at a higher scale or change it dramatically to use vector-based drawing. Be aware that even if the control is tricked into drawing at a higher resolution, if it is being rendered to an Image, it will still appear blurry. The scale of the Image will also have to dealt with.
WinForms Controls: Stop using WinForms controls! No seriously, you’re killing your application’s memory usage and performance by dropping these into your WPF application.
I hope this gives you all a starting point to making your WPF application scale. It’d be really nice if more applications featured this ability, even if as a user-preference.


Very useful! Thank you!
This is perfect for my needs, thank you for sharing!
Nice, this is just what I was looking for. Got a simple demo working. Now to try and incorporate this into our existing application. Kudos !
thanks